Miniature Toadstools
by Vicky Guile
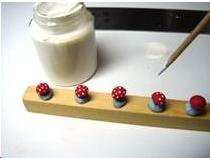
Items required...
Liquid clay or tacky glue.
White acrylic paint.
Brown chalk pastel.
Paintbrush.
Cocktail Sticks.
Ball Stylus tool.
Craft knife.
Ceramic tile or baking tray (it’s important that you don’t use a tray that might get used for real food preparation).
White paper (the regular kind, not specially coated or high gsm printer paper).
Step 1.

Make a ball of white clay about ½” in diameter, then a ball of brown clay about 1/8” in diameter. Mix the brown clay with the white until the colour is even, you are looking for a very slight off-white. This will be used for the stalks and the underside frills of your toadstools.
Step 2.

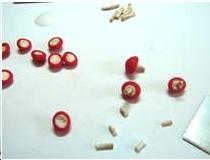
Take a small piece of the off-white clay and roll into a long sausage, you want this to be very thin, less than 1/16”, with your craft knife cut the sausage into lengths around ¼” long. These will be used for the stalks of your toadstools.
Step 3.

Scribble some brown pastel onto a piece of paper, then using your paintbrush, pick up a tiny amount of the chalk dust and dab gently onto the stalks, you are aiming for a patchy/muddy in places effect, so don’t shade in the whole of each stalk. Once shaded, carefully pick them up and place onto your baking tray/ceramic tile. I find that its best to line the tray or tile with a sheet of plain white paper, it stops the clay becoming shiny on the areas where it is in contact with the tray/tile.
Step 4.

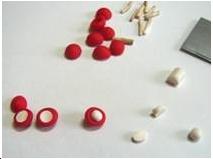
Take a piece of red clay, enough to make a ball about ½” in diameter. Roll the clay into a sausage shape about ¼” in diameter, then cut into slices of various thicknesses, no thicker than 1/8”. Roll each of these slices into a ball.
Step 5.

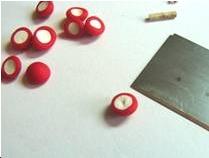
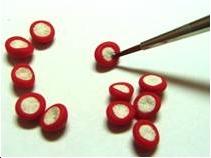
This is the tricky part...place one ball of red clay into the palm of you hand and using your ball stylus tool, make a firm indentation in the centre. Now you want to slowly and firmly ease the stylus around in circles, pushing the clay as you do. It takes a little practice at first, but what you should end up with is a cup shape. Once you have shaped all of your balls of red clay, place them on the tray/tile with the stalks.
Step 6.

Preheat your oven to the correct temperature as on the polymer clay packet instructions, this varies with each brand of clay.
When your oven has reached the required temperature, bake your clay for required amount of time as per the packet instructions.
Once it has finished baking, leave to cool and then we can continue with the toadstools.
Step 7.

Arrange your toadstools as required!